Path animation - 1
Table of contents
This is the very first blog of my animation series.
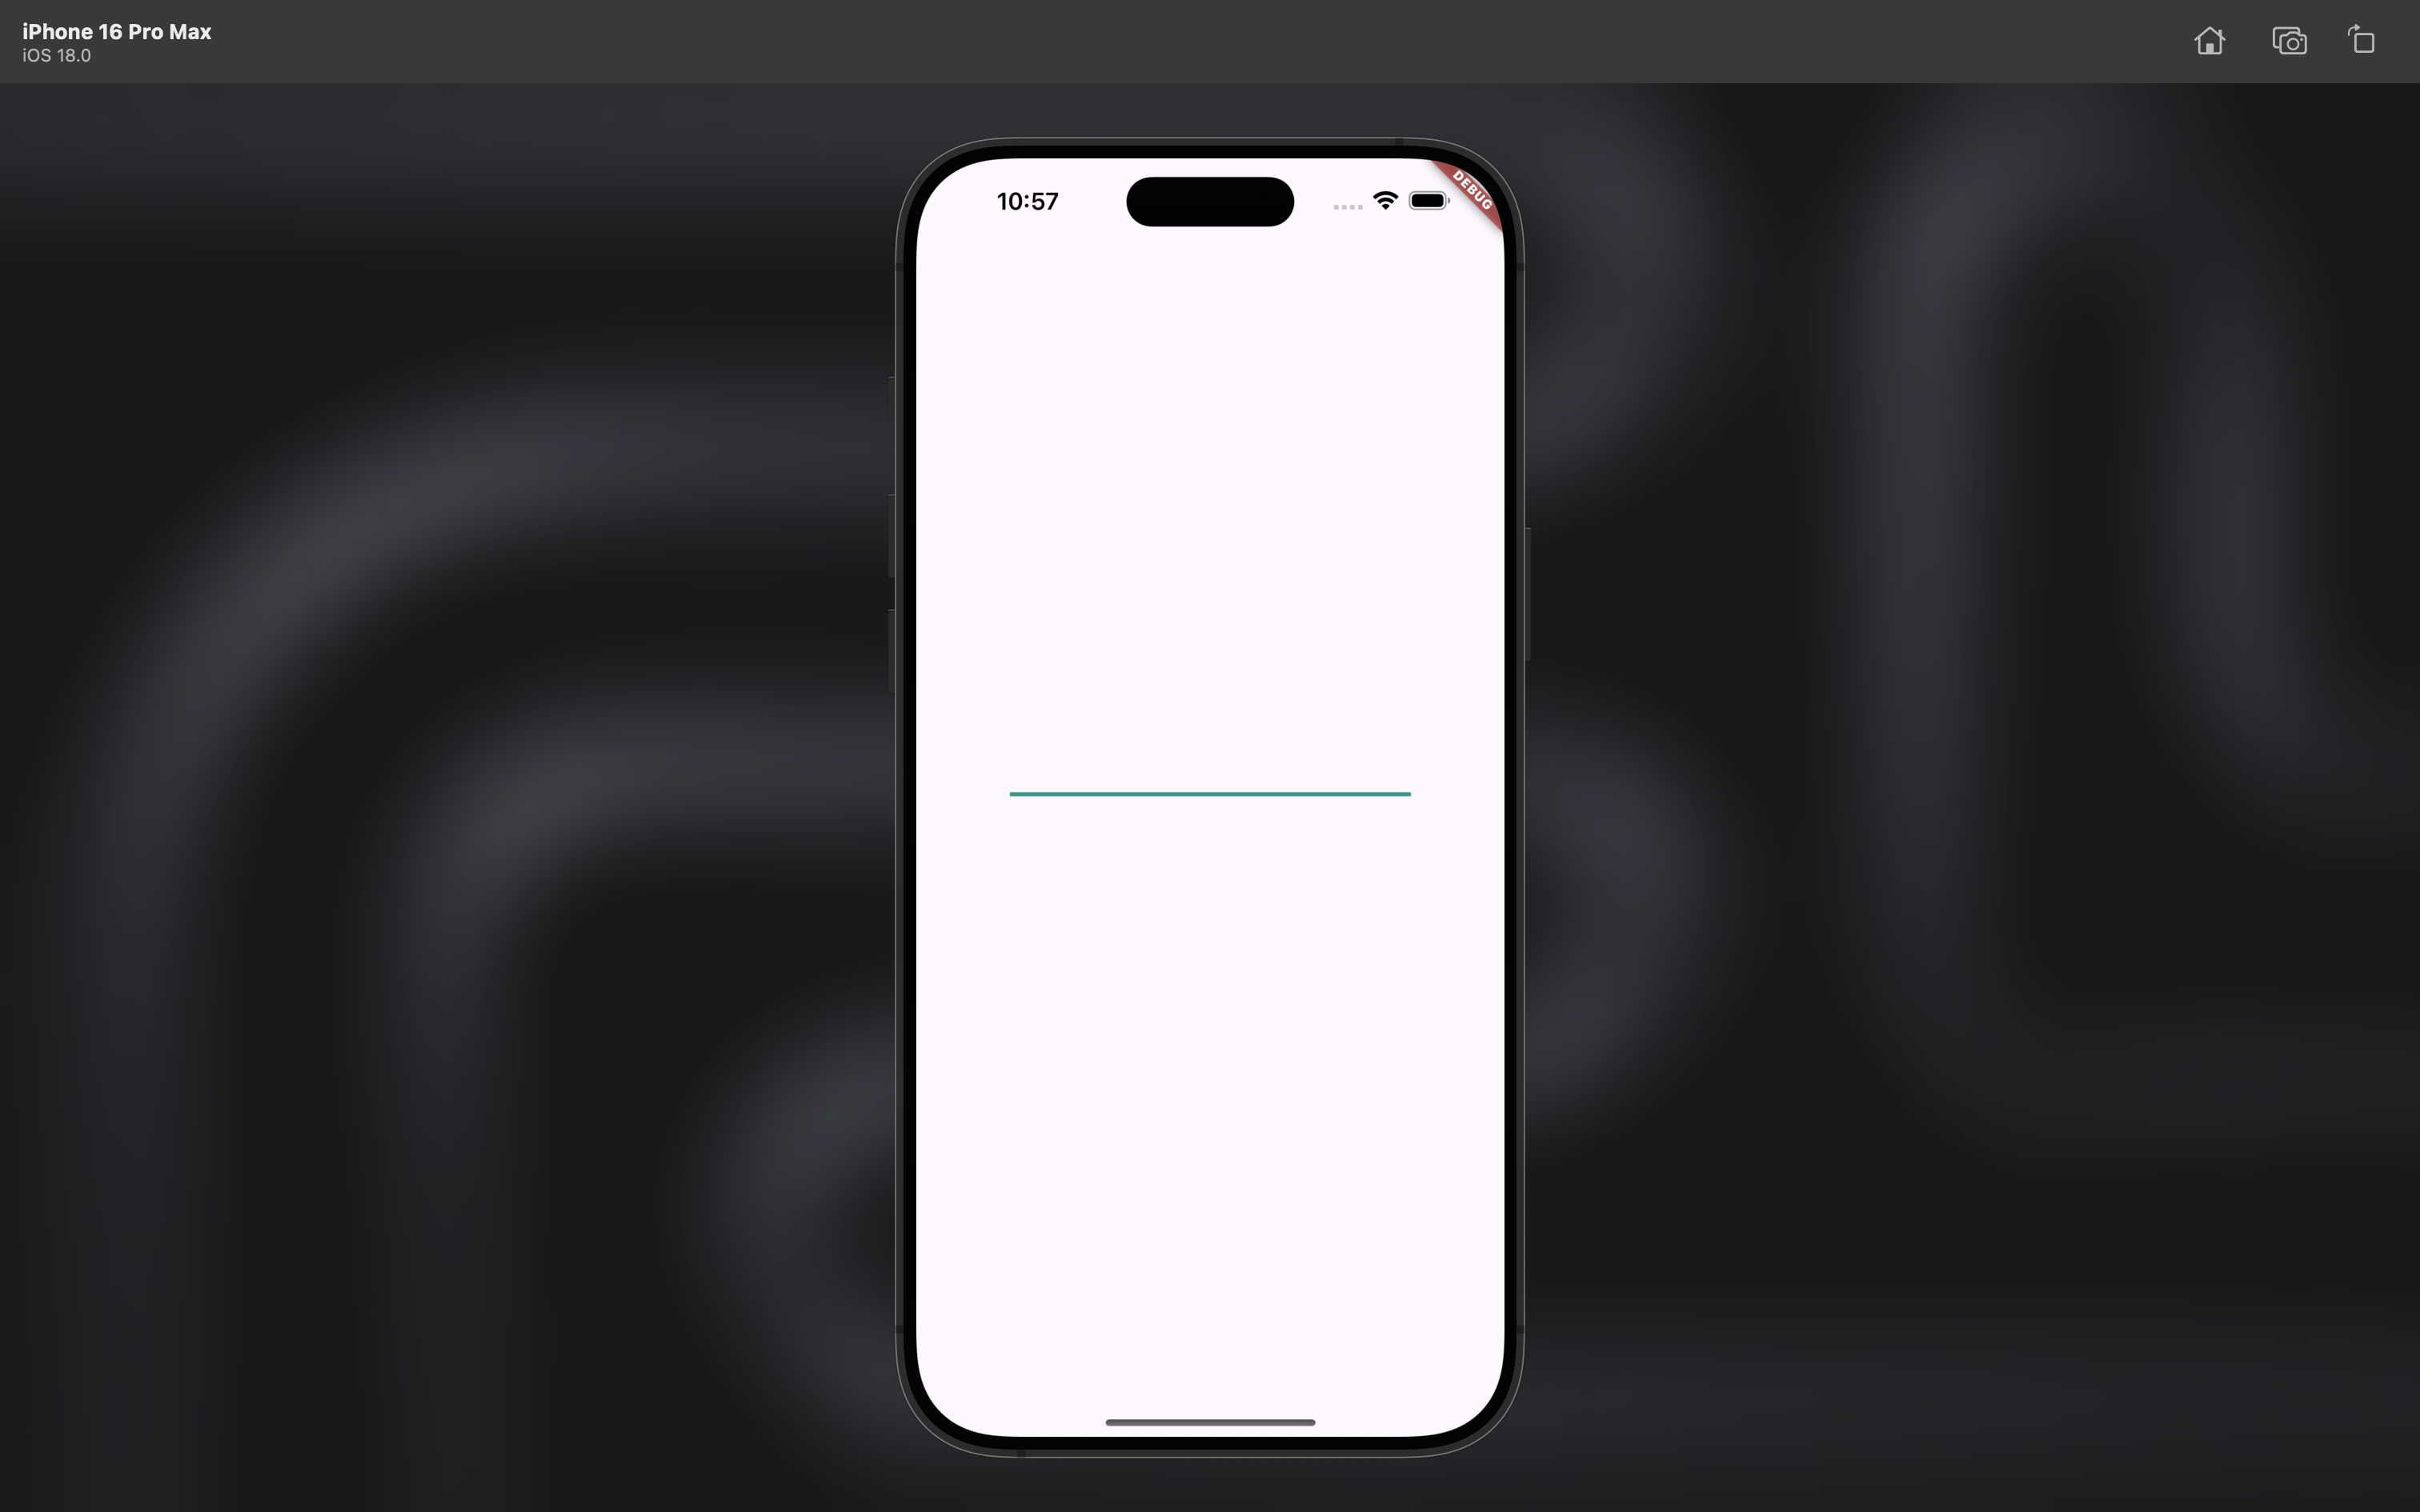
In this tutorial, I will focus only on how to create animated line using custom path. Let’s make a simple animated horizontal line using CustomPaint, AnimationController and a bit of computation.
Don’t worry! I’ll start from the simple one.
Project Setup
You will need to have Flutter installed on your local machine.
See flutter installation here
Clone this project source code and run command flutter pub get. Then, you are ready to get started.
Line Path creation with CustomPainter
Before we dive into path animation, let's start creating a simple line path that extends `CustomPainter` class.
class LinePathPainter extends CustomPainter {
  final Color color;
  final double strokeWidth;
  const LinePathPainter({
    required this.color,
    this.strokeWidth = 3.0,
  });
  Path _createLinePath(Size size) {
    var path = Path();
    path.lineTo(size.width,0.0);
    return path;
  }

  @override
  void paint(Canvas canvas, Size size) {
    final path = _createLinePath(size);

    final Paint paint = Paint();
    paint.color = color;
    paint.style = PaintingStyle.stroke;
    paint.strokeWidth = strokeWidth;
    canvas.drawPath(path, paint);
  }

  @override
  bool shouldRepaint(CustomPainter oldDelegate) => true;
}
Line path creation occurs inside _createLinePath function. Currently, we only have a line that starts from (0.0,0.0) to (size.width, 0.0).
Path Tracing
Okay now, let’s write the magic code ( not really tho :3 )
Flutter has computeMetrics method that returns PathMetric object which describes various properties about the contours of the Path.
I’ll use extension methods for path animation logic to provide scalability and memoization technique for better performaance.
extension PathEx on Path {
  static List<PathMetric>? _metricsCache;
  List<PathMetric> getMetrics() {
    _metricsCache ??= computeMetrics().toList();
    return _metricsCache!;
  }

  Path createAnimatedPath(
    double animationPercent,
  ) {
    // If animation is completed, return the original path directly.
    if (animationPercent == 1.0) {
      return this;
    }

    final totalLength = getMetrics()
        .fold(0.0, (double prev, PathMetric metric) => prev + metric.length);
    final currentLength = totalLength * animationPercent;
    return _extractPathUntilLength(currentLength);
  }

  Path _extractPathUntilLength(
    double length,
  ) {
    var currentLength = 0.0;
    final path = Path();

    var metricsIterator = getMetrics().iterator;
    while (metricsIterator.moveNext()) {
      var metric = metricsIterator.current;
      var nextLength = currentLength + metric.length;
      final isLastSegment = nextLength > length;
      if (isLastSegment) {
        final remainingLength = length - currentLength;
        final pathSegment = metric.extractPath(0.0, remainingLength);
        path.addPath(pathSegment, Offset.zero);
        break;
      } else {
        final pathSegment = metric.extractPath(0.0, metric.length);
        path.addPath(pathSegment, Offset.zero);
      }

      currentLength = nextLength;
    }
    return path;
  }
}
Let’s break down the code.
_metricsCache will be computed once and stored for further use. Total metric length and current metric length based on animation percentage is computed in createAnimatedPath function.
PathMetric has extractPath method takes start, end values and returns the path segment of the given length.
This is it. Computation for path animation is completed.
Now, we just need to add AnimationController and actually animate the path.
Here’s updated LinePathPainter class with animation value. For clarity, only updated part will be shown.
class LinePathPainter extends CustomPainter {
  final Animation<double> _animation;
  final Color color;
  final double strokeWidth;
  const LinePathPainter(
    this._animation, {
    required this.color,
    this.strokeWidth = 3.0,
  });

  // same old code

  @override
  void paint(Canvas canvas, Size size) {
    final animationPercent = _animation.value;
    // call path animation extension method based on current animation value [0.0 to 1.0]
    final path = _createLinePath(size)
                  .createAnimatedPath(animationPercent);
    // same old code
  }
  // same old code
}
After that, you’ll only need to create a StatefulWidget with AnimationController.
class AnimatedWave extends StatefulWidget {
  const AnimatedWave({super.key});

  @override
  AnimatedWaveState createState() => AnimatedWaveState();
}

class AnimatedWaveState extends State<AnimatedWave>
    with SingleTickerProviderStateMixin {
  late final AnimationController pathController;

  @override
  void initState() {
    super.initState();
    pathController = AnimationController(
      vsync: this,
      duration: const Duration(
        milliseconds: 1000,
      ),
    )
    ..repeat(reverse: true)
    // without `setState`, path animation won't show
    ..addListener(
        () => setState(() {}),
      );
  }

  @override
  void dispose() {
    pathController.dispose();
    super.dispose();
  }

  Animation<double> get pathTween => CurvedAnimation(
        parent: pathController,
        curve: Curves.easeInOut,
      );

  @override
  Widget build(BuildContext context) {
    return Scaffold(
      body: Center(
        child: SizedBox(
              width: 300,
              height: 5,
              child: CustomPaint(
                painter: LinePathPainter(
                  pathTween,
                  color: Colors.teal,
                ),
              ),
            ),
      ),
    );
  }
}
Everything is ready now. Here’s the result.
With this, we can create more complex animated paths. Here’s another example of animated wave path.
class WavePathPainter extends CustomPainter {
  final Animation<double> _animation;
  final Color color;
  final double strokeWidth;
  const WavePathPainter(
    this._animation, {
    required this.color,
    this.strokeWidth = 3.0,
  });

  Path _createWavePath(Size size) {
      var path = Path();
      // wave path code here
      return path;
  }

  @override
  void paint(Canvas canvas, Size size) {
    final animationPercent = _animation.value;
    final path = _createWavePath(size)
                  .createAnimatedPath(animationPercent);

    final Paint paint = Paint();
    paint.color = color;
    paint.style = PaintingStyle.stroke;
    paint.strokeWidth = strokeWidth;
    canvas.drawPath(path, paint);
  }

  @override
  bool shouldRepaint(CustomPainter oldDelegate) => true;
}
}
Every computation related to wave path creation is inside the _createWavePath function.
We can assume that a wave is made of two cubic bezier segments in Flutter. One is drawn from top to bottom and the other is from bottom to top.
Learn more about path.cubicTo method
Here’s the code for 5 cubic bezier segments that form a wave.
var x = 0.0;
var segments = 5;
var increment = size.width / segments;
bool startFromTop = true;
while (x < size.width) {
  if (startFromTop) {
    path.moveTo(x, 0);
    path.cubicTo(
      x + increment / 2, 0,
      x + increment / 2, size.height,
      x + increment, size.height,
      );
  } else {
    path.moveTo(x, size.height);
    path.cubicTo(
      x + increment / 2, size.height,
      x + increment / 2, 0,
      x + increment, 0,
      );
  }
  x += increment;
  startFromTop = !startFromTop;
}
And the result is …
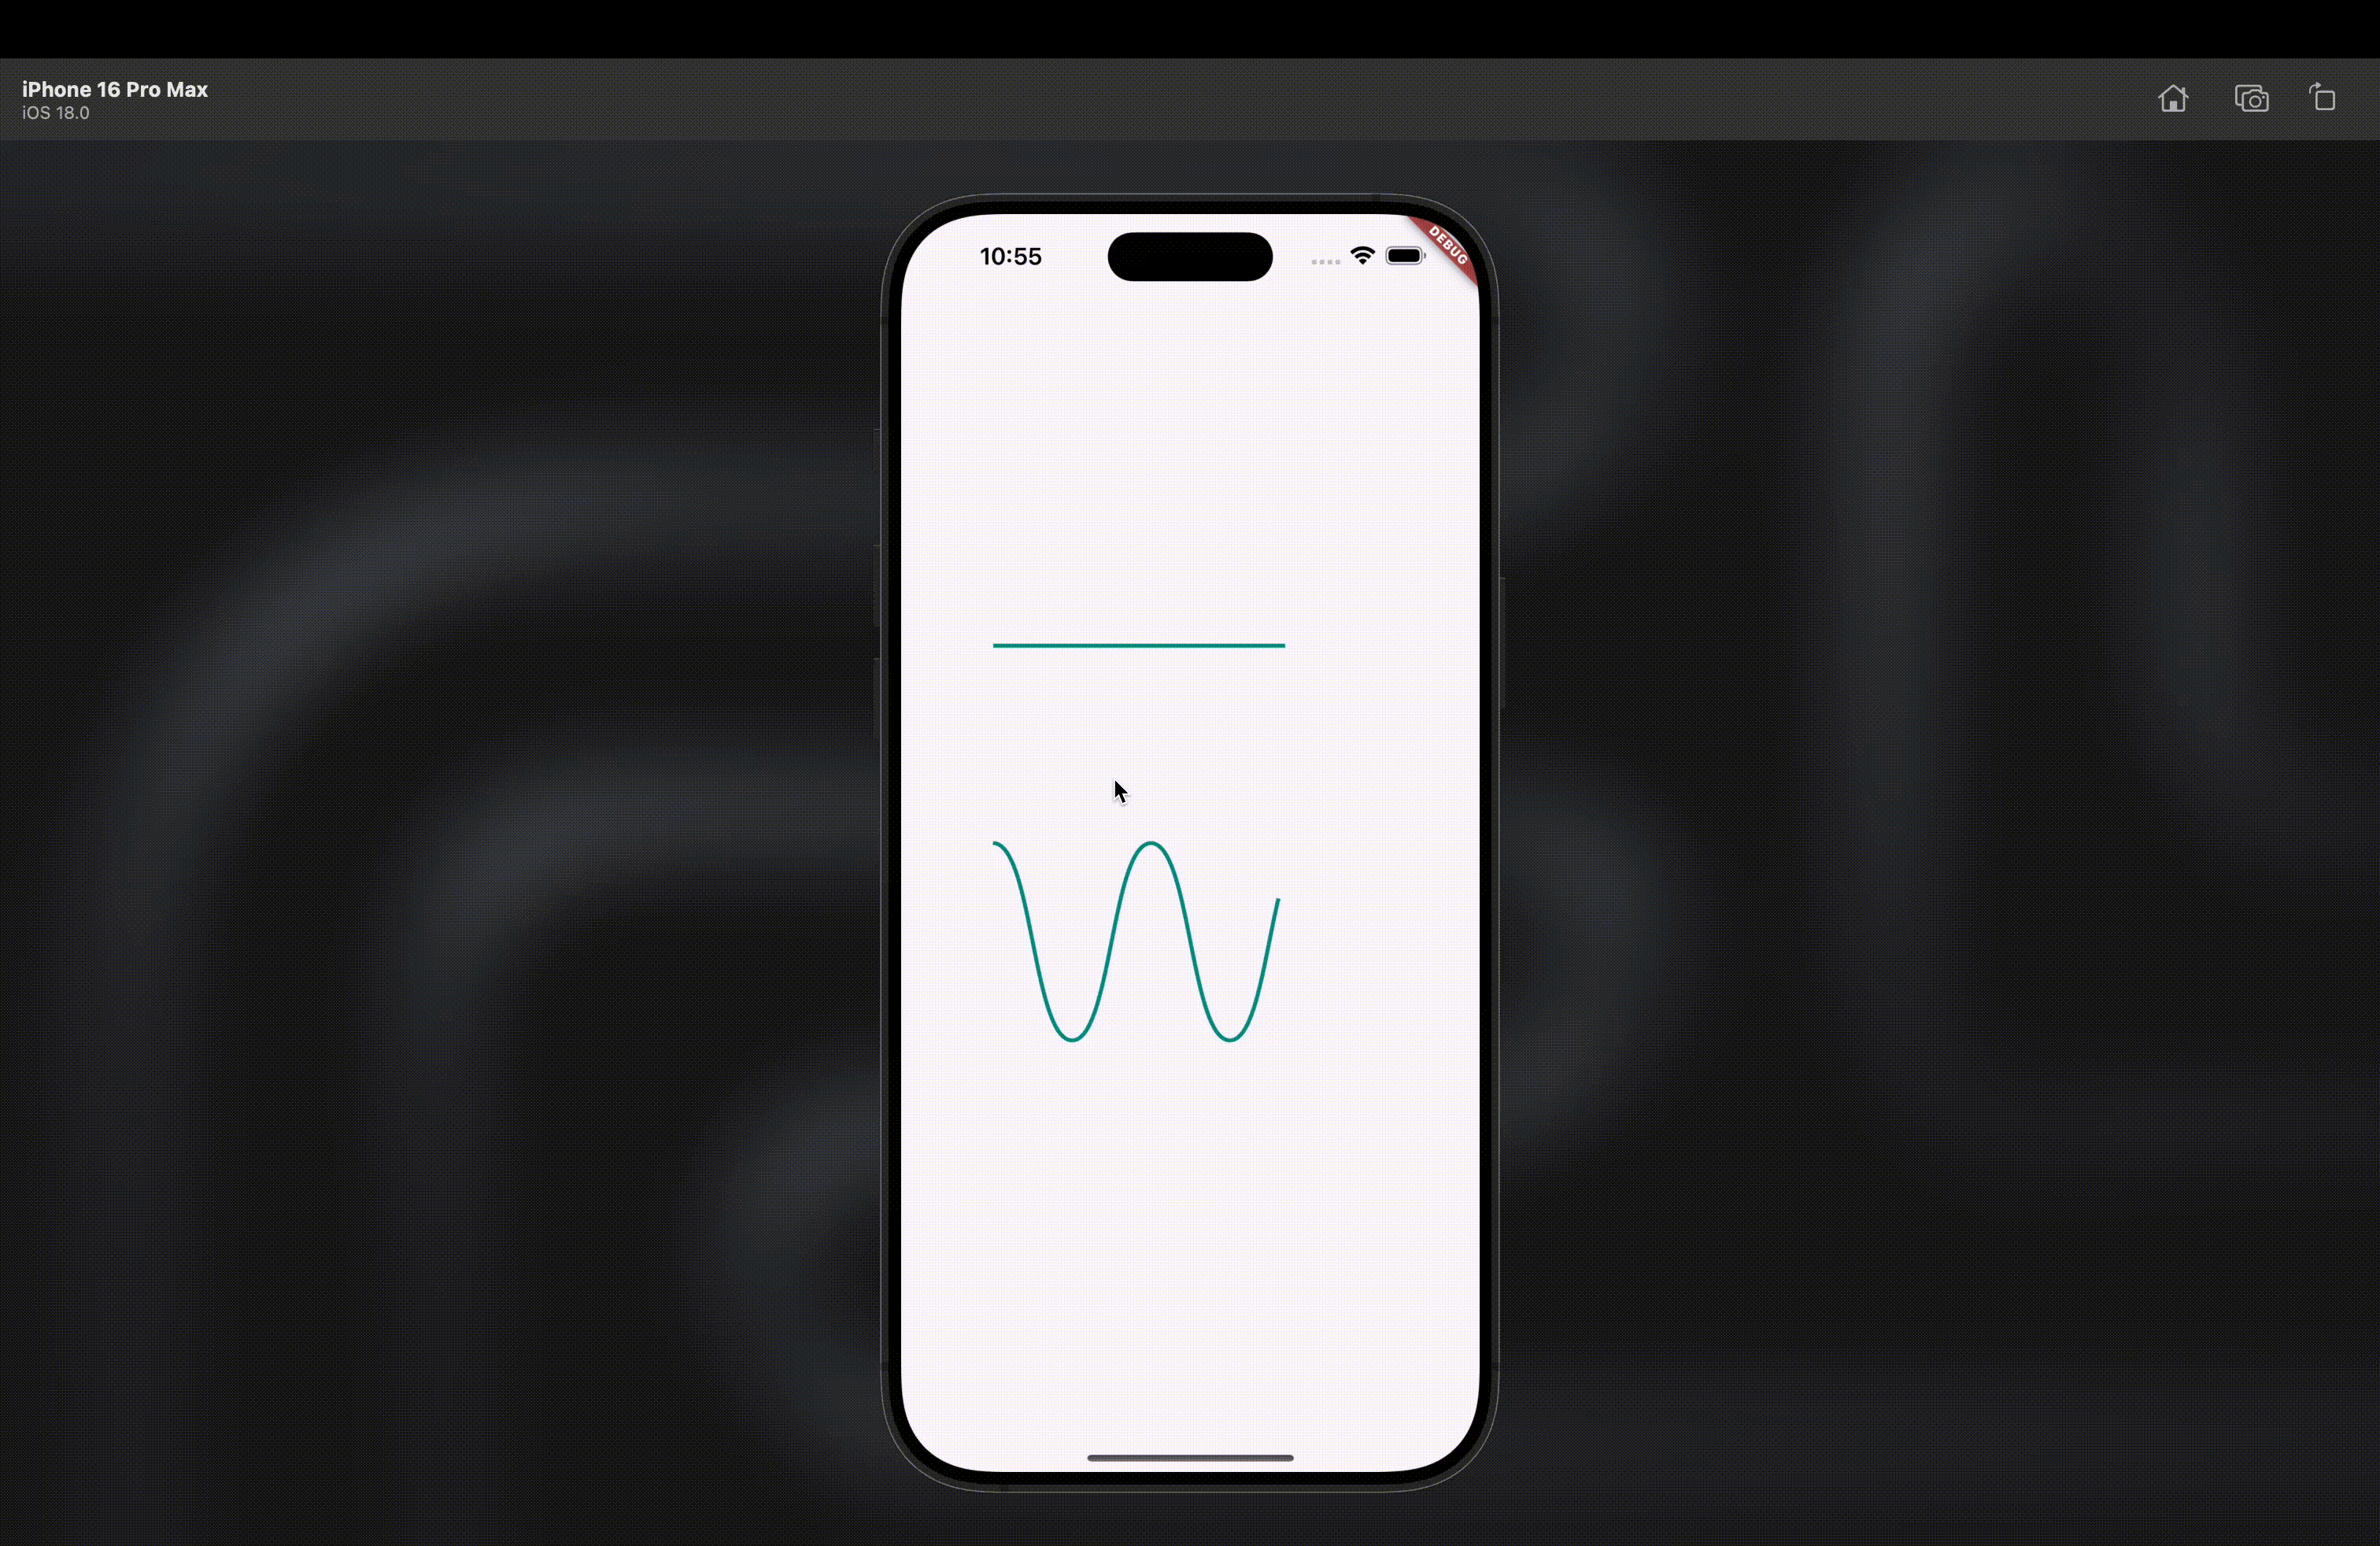
It’s beautiful, isn’t it? We can now animate any Path efficiently without adding extra overhead.
Note: Using path animation for very complex
Pathmay lead to performance degradation and frame drops.